Why SwiftUI
Two engineers, same task: build a screen with a title and a subtitle. One opens UIKit, writes about thirty lines, and ships it. The other opens SwiftUI, writes five lines, and ships the same screen.
The shorter version isn’t shorter because SwiftUI is “less powerful.” It’s shorter because SwiftUI is solving a different problem — and that shift is what this lesson is about. Not syntax. Not modifiers. Not even how to make a button. Just one mental pivot, and once you make it, everything else in this course clicks.
If you came here for “in this course we will explore…”, you can skip ahead. We start with a comparison that actually means something.
Two screens, two worlds
A screen with a title and a subtitle. Bog-standard launch view. Here’s the UIKit version.
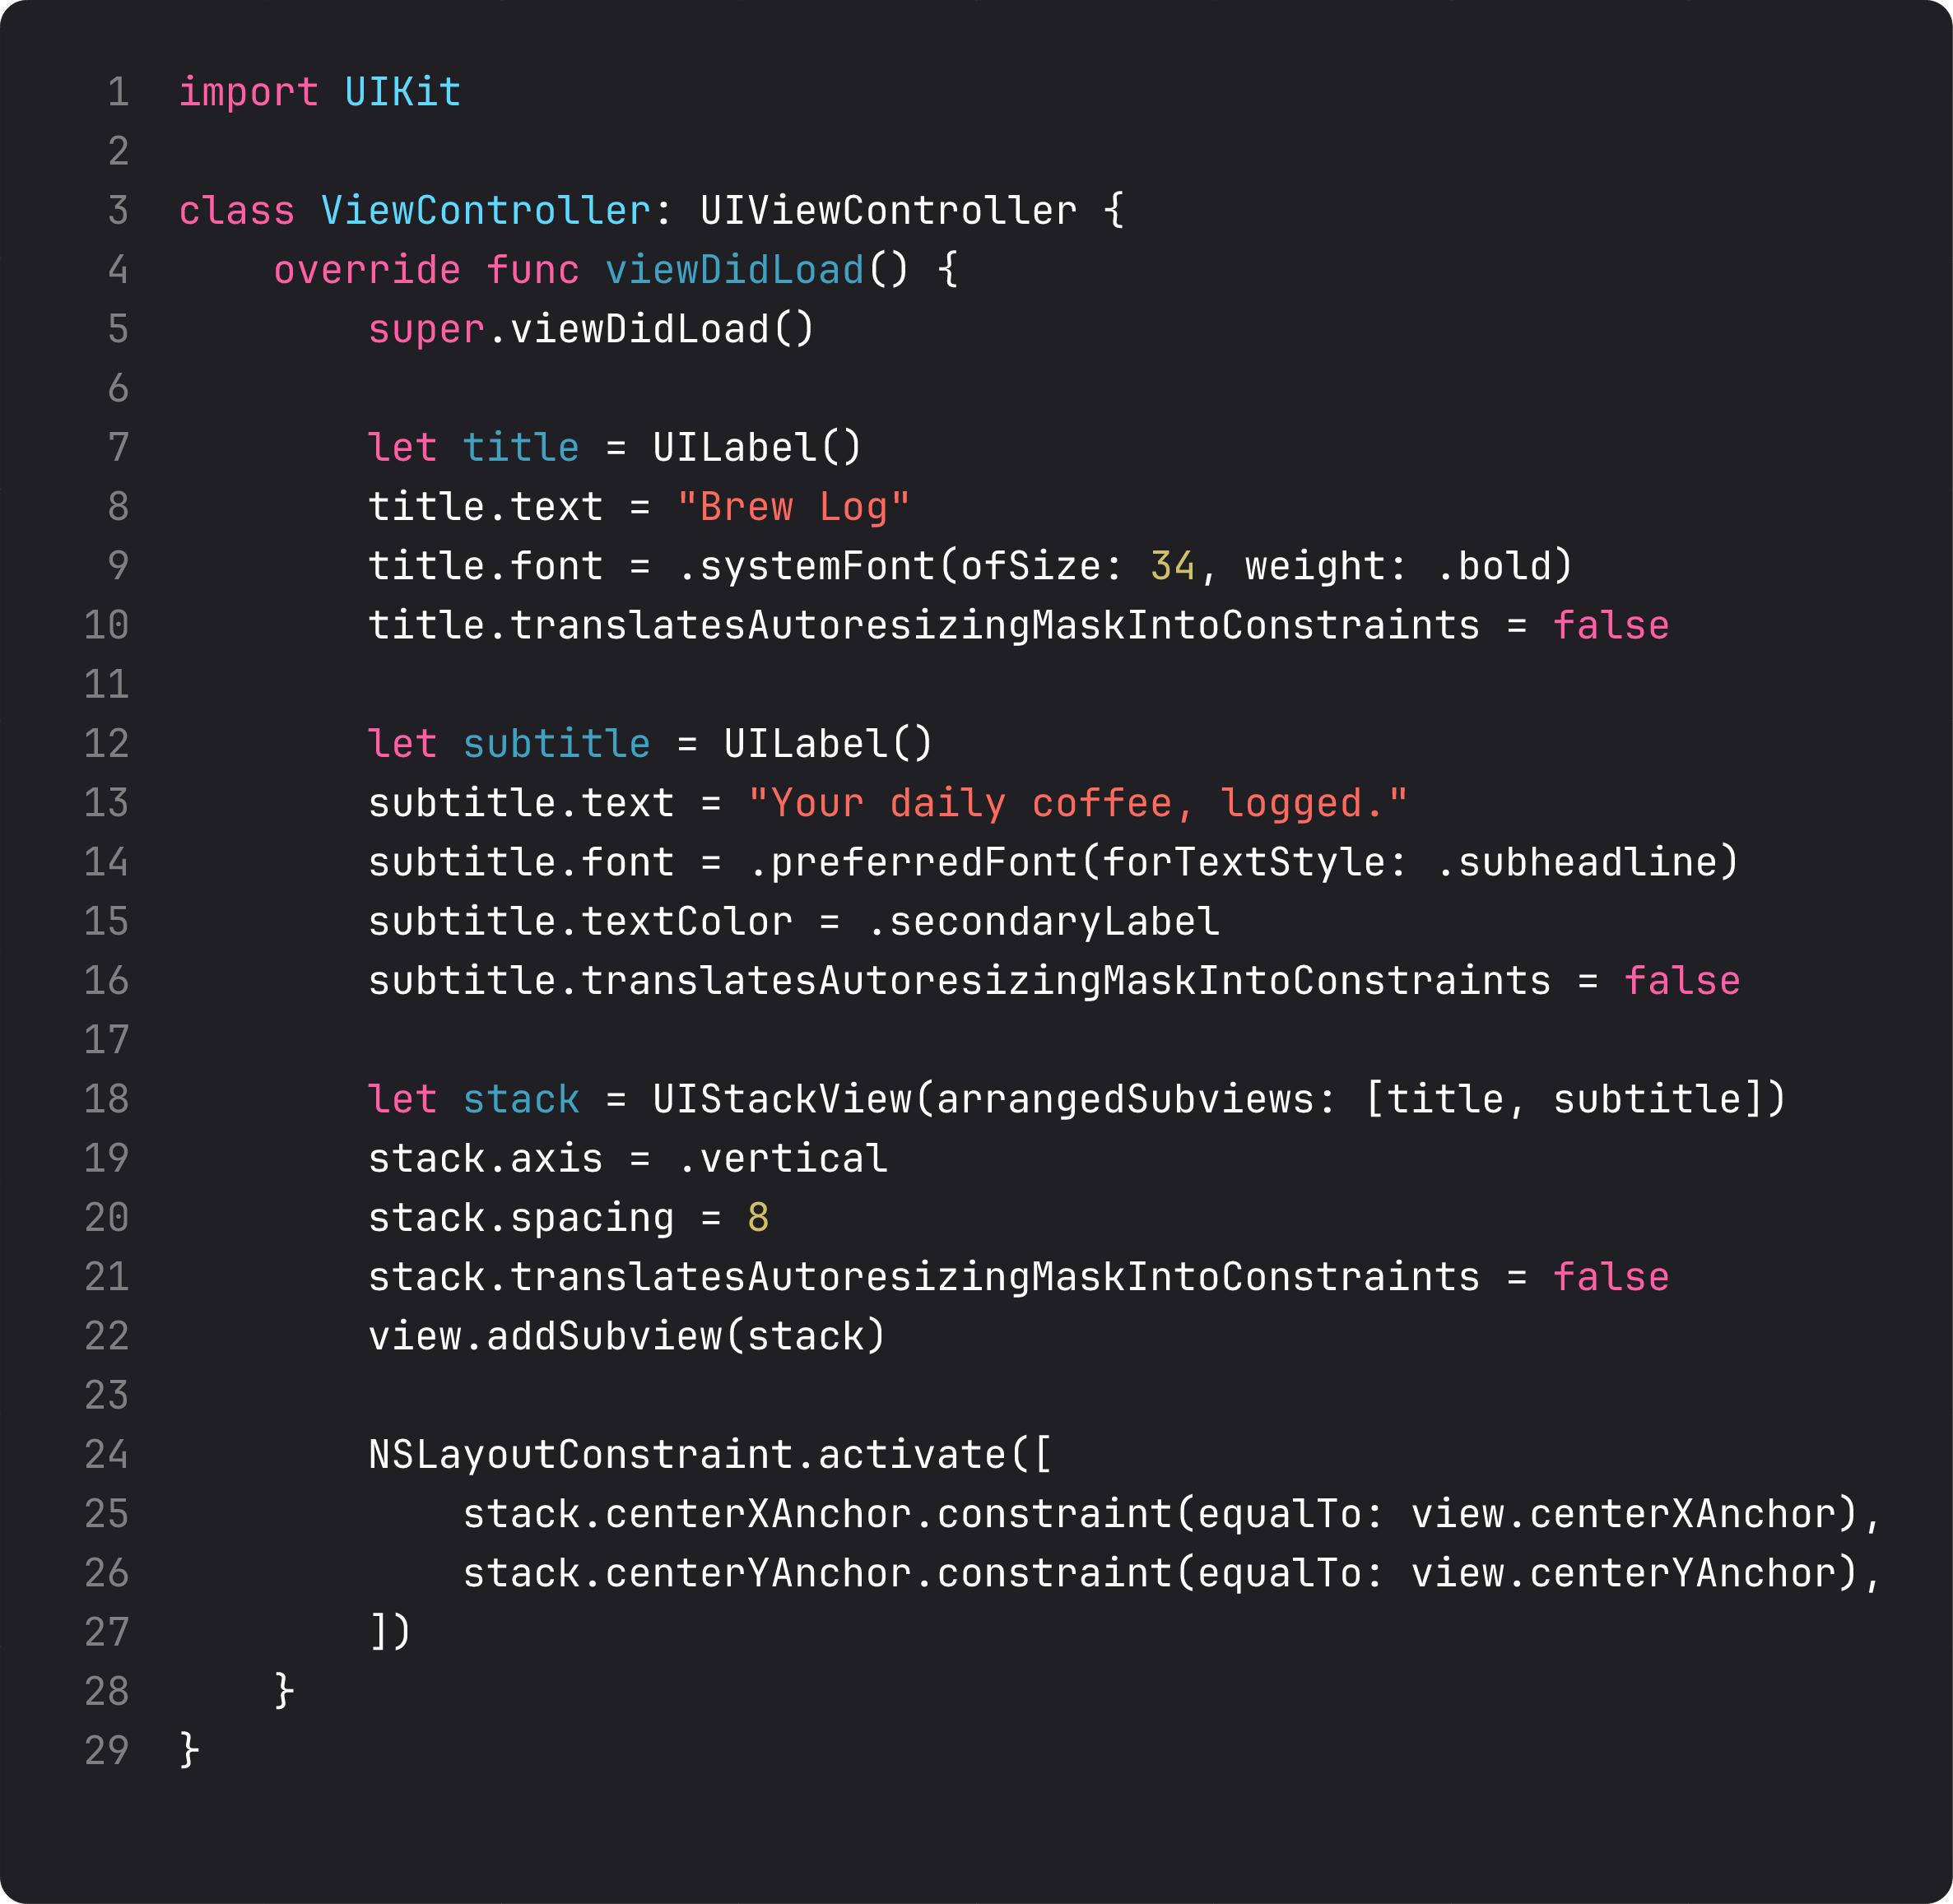
Twenty-nine lines. Three of them do the actual work — set text, set font, set color. The other twenty-six are scaffolding. You’re explaining how to draw the screen, not what should be on it.
Now SwiftUI:
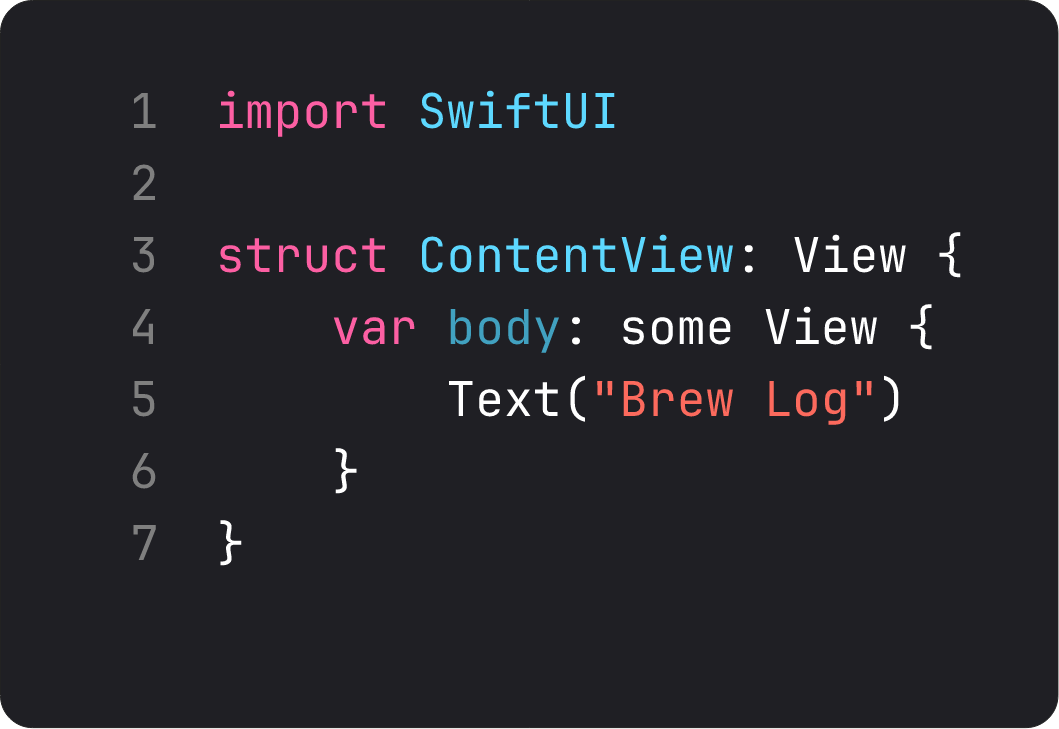
Five lines. A struct that conforms to View. A computed property called body that returns… a view. Same screen, minus the styling — we’ll add that in a minute.
Sit with the comparison for a second. Twenty-nine lines vs five. Same outcome. Not because SwiftUI is “less powerful” — because SwiftUI is solving a different problem.
The mental shift: views are values, body is a function
Here’s the thing nobody told me until lesson 60-something of an Udemy course I won’t name: a SwiftUI view is not an object. It’s a value.
When you write Text("Brew Log"), you’re not creating a UI element that lives somewhere on the heap. You’re creating a tiny Swift struct — about 32 bytes — that describes what should be on screen. The framework reads that description and figures out the rendering.
Body is a function from state to UI. Every time something changes — state, environment, the parent view — SwiftUI calls body again, gets a new description, diffs it against the previous one, and updates only what’s different.
Real-life analogy: UIKit is like cooking a recipe step by step — chop, sauté, add cream, stir. You’re managing the kitchen. SwiftUI is like ordering at a restaurant — you describe the dish, and the kitchen handles every step. If you change your mind and ask for it without cream, the kitchen doesn’t redo the meal from scratch — it knows exactly what to adjust.
That’s the model. Read it twice if you need to. Once it lands, the rest of this course makes sense.
But wait — body runs every time?
Sounds wasteful. “It calls body on every state change?” You probably see the cost coming: surely we’re allocating hundreds of structs per second.
We are. And it’s fine. Two reasons.
First — these are tiny stack-allocated structs. Allocating one is cheaper than acquiring a mutex. The framework was designed assuming this would happen all day, every day.
Second — SwiftUI has a runtime that diffs the new view tree against the old one and only re-renders what actually changed. Underneath the hood you’ve still got UIKit views (in most cases). The diff means we don’t recreate them — we just update properties on the existing ones.
This is React’s model from a decade ago, ported to native iOS, with one difference: in React, the diff runs in JavaScript and then talks to the DOM. In SwiftUI, the diff runs in compiled Swift and updates Apple’s native view system directly. Faster ceiling.
You don’t need to understand the internals to use SwiftUI. But you should at least know: “body runs on every state change” isn’t a bug. It’s the design.
The same screen, with style
Let’s get our SwiftUI version to feature parity with the UIKit one — title, subtitle, secondary color, vertical layout.
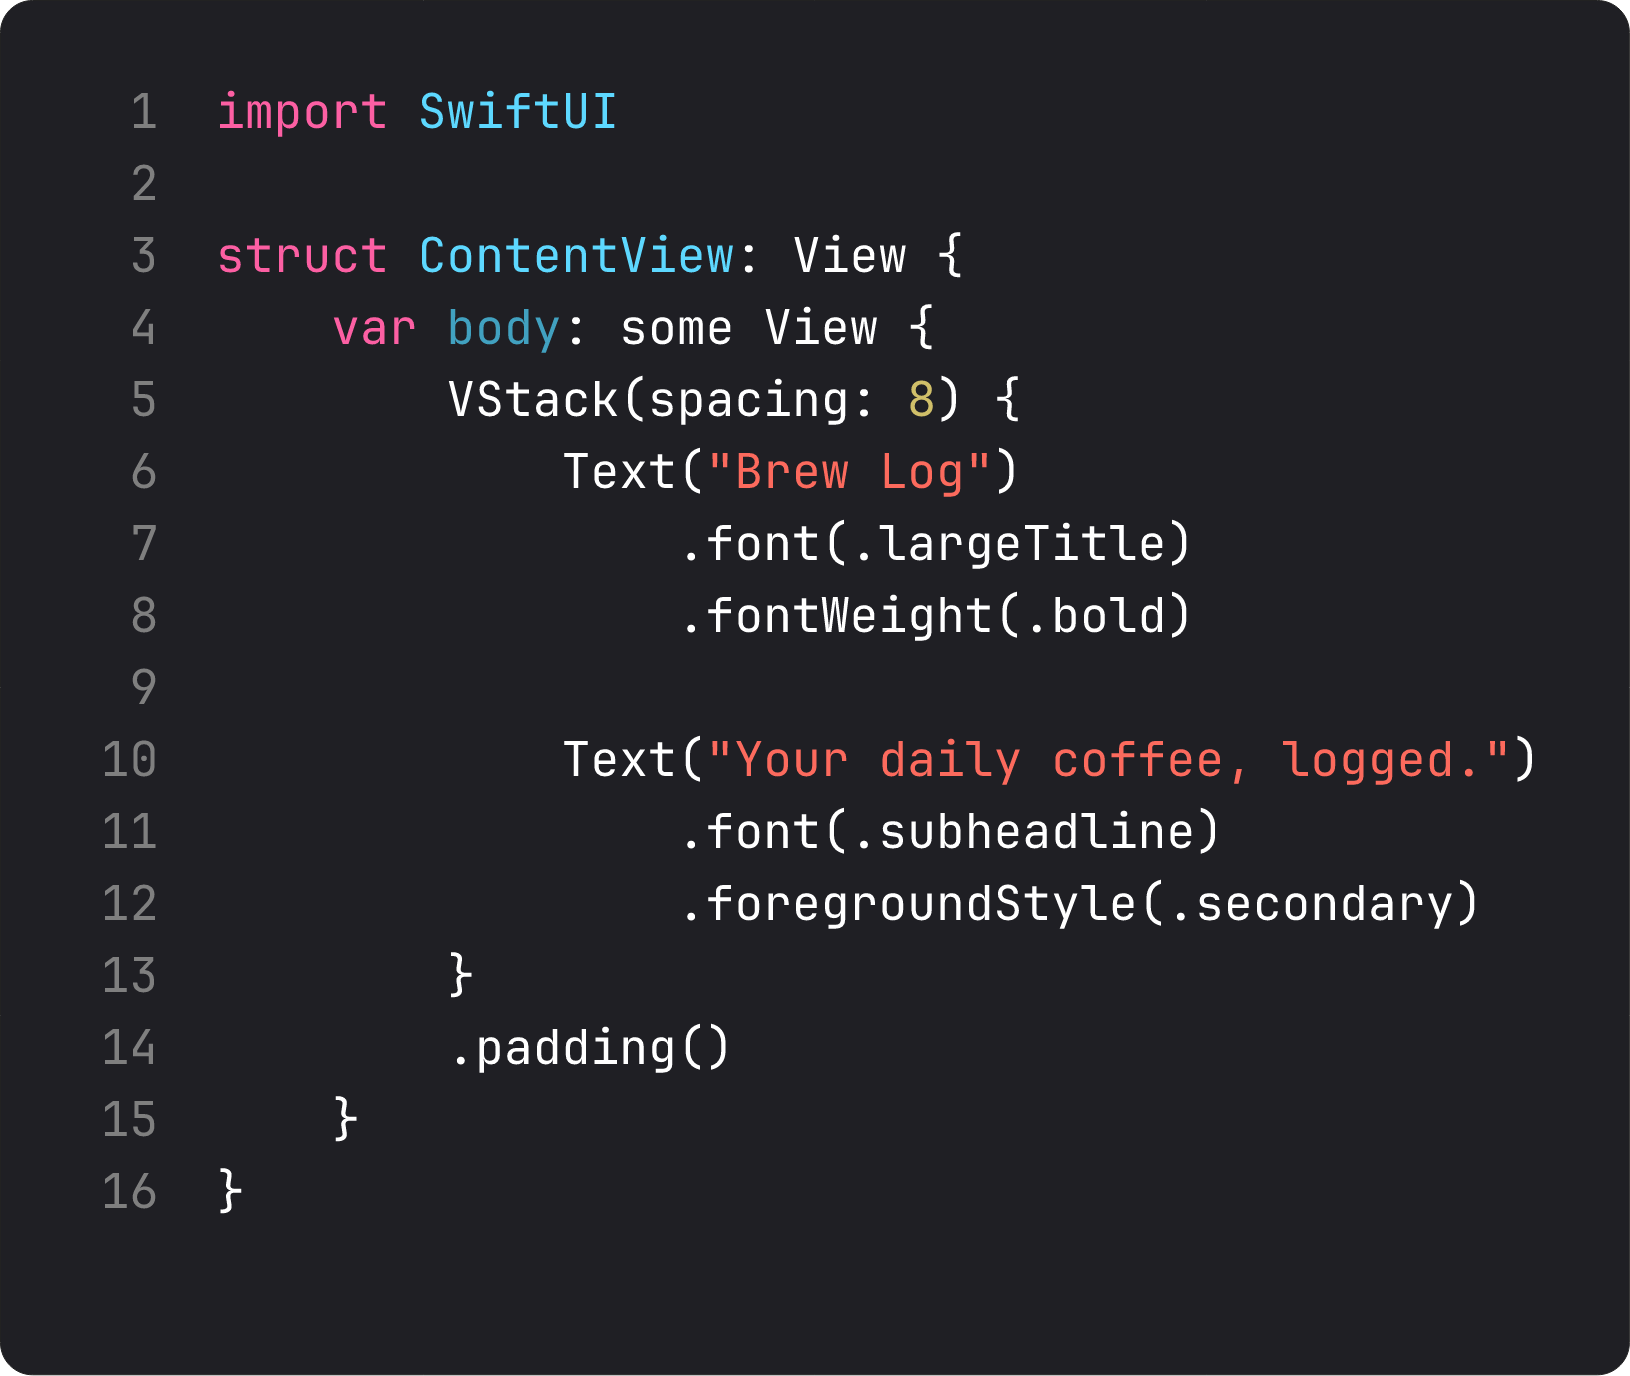
Fifteen lines. A VStack with two Text views, each styled with modifiers. .padding() on the whole stack.
Two things easy to miss:
- The view types tell a story.
VStacksays “vertical layout.”Textsays “this is text.” There’s no UILabel-vs-UITextField decision to make. The intent lives in the type name. - No outlets, no view controllers, no constraints, no autoresizingMask. The whole machinery you fight in UIKit is gone. You declare what you want; the framework lays it out.
If you’re coming from UIKit, this is the moment your brain relaxes.
A trap I see every week
I review code people generate with AI. Every week, when someone asks an LLM “give me a SwiftUI screen with a title and a subtitle,” I see this exact pattern:
struct ContentView: View {
    @State private var title: String = "Brew Log"
    @State private var subtitle: String = "Your daily coffee, logged."

    var body: some View {
        VStack {
            Spacer()
            HStack {
                Spacer()
                VStack {
                    Text(title)
                    Text(subtitle)
                }
                Spacer()
            }
            Spacer()
        }
    }
}
This is what I mean by anti-vibe-coding. The LLM generated something that works, but it added complexity that doesn’t earn its keep.
@Statefor static strings. The values never change, so they have no business being state. SRP — single responsibility — says state holders hold things that mutate. These don’t mutate.- Six
Spacers and three nested stacks to “center” content..padding()and the default VStack centering would do the same in one line. - No styling at all. The LLM was structurally enthusiastic but visually empty — a screen that “compiles and runs” but a designer would reject in five seconds.
Throughout this course, when I show you something, I’ll often call out the version an LLM would write — and why the simpler version is what an experienced engineer would actually ship. Vibe coding gets you to running. It rarely gets you to good.
Where SwiftUI still hurts (we don’t lie here)
I’m not going to sell you on SwiftUI being perfect. It isn’t.
- Custom layout edge cases. The
Layoutprotocol is great, but there will be days when the stack-of-stacks approach can’t do what you want without breaking something else. - Animation edge cases. Apple’s animation system is gorgeous out of the box. The day you need a precise gesture-driven non-standard transition, you’ll be reading Twitter threads at 11pm.
- Debugging the diff. When SwiftUI re-renders too often — or not enough — figuring out why is dark art. Instruments has tools for this; we’ll cover them in Course 2.
- UIKit interop. Sometimes you drop down to
UIViewRepresentable. That’s normal. SwiftUI doesn’t replace UIKit — it sits on top of it.
But for ~90% of screens, SwiftUI is faster to write, easier to read, and harder to break. That’s the trade we’re making throughout this course.
What it looks like running

Open the BrewLog project, run it in the simulator, and you’ll see this. Centered title, centered subtitle in secondary color. Fifteen lines of code, plus you get system font, accessibility traits, dark mode (flip Appearance and watch it adapt without a line from us), and Dynamic Type — for free.
That’s the deal. SwiftUI gives you 90% of what UIKit gives you, with 10% of the code. The trade: you hand over some control over how it draws.
Most of the time, that’s a great trade.
Takeaway
Views are values. Body is a function from state to UI. Everything else in this course is built on those two sentences.
If you internalize the model — no syntax, no modifier list, just the mental picture — you’re already ahead of 80% of people writing SwiftUI in production.
Next lesson: we set up the BrewLog project from scratch — no Xcode template magic — and learn the file structure that actually scales to a real app.
NativeFirst Team
EditorialThe NativeFirst team — engineers and designers building native Apple apps and writing the courses we wish we had when we started.
Comments
Leave a comment